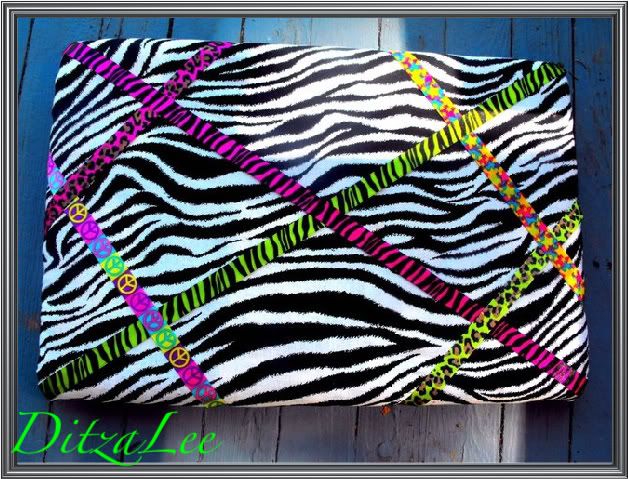
I finished the picture board for Jalaya's room!!
 I changed my mind about the first initial fabric I had laid out for the project.
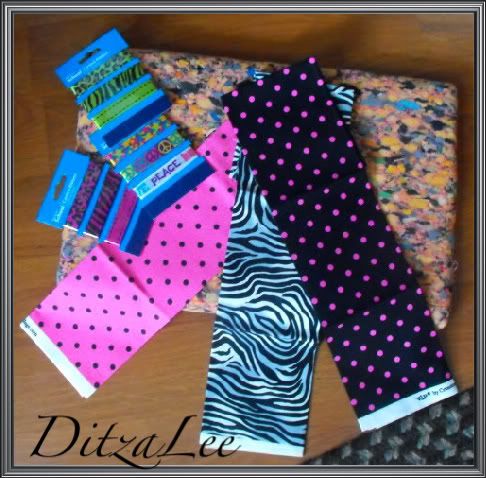 Plenty of other things I could use that for, I might toss it over to the throw pillow pile, one of the hundreds of to do's...
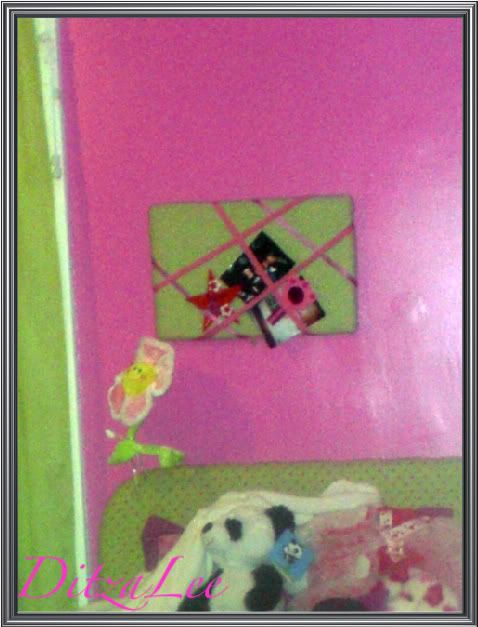
This is the first original picture board I had done for Jalaya about 5 years ago. It's pathetic I know, it was back when our Wal-mart carried actual bolts of fabric, I got enough of the fabric for both the board and the headboard that I had also covered.
Plenty of other things I could use that for, I might toss it over to the throw pillow pile, one of the hundreds of to do's...
This is the first original picture board I had done for Jalaya about 5 years ago. It's pathetic I know, it was back when our Wal-mart carried actual bolts of fabric, I got enough of the fabric for both the board and the headboard that I had also covered.
 Sorry for the crummy picture quality...they were taken by an even more crummy camera :)
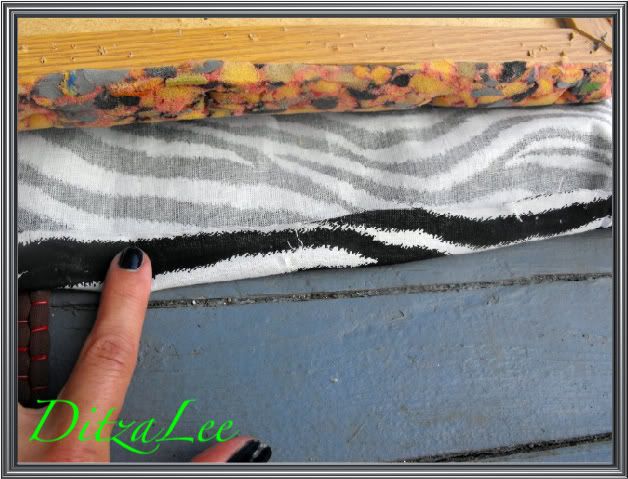
![]() The board actually started out as a regular cork board who lived in my room during my teenage years. The foam stapled to the outside is carpet padding from the rugs we pulled up when we moved in. There was no smell or anything else that would deter me from recycling it. So I used it for the cork board & the headboard as well. AAAnd I still have a bunch of it sealed up in a garbage bag in my basement.
The board actually started out as a regular cork board who lived in my room during my teenage years. The foam stapled to the outside is carpet padding from the rugs we pulled up when we moved in. There was no smell or anything else that would deter me from recycling it. So I used it for the cork board & the headboard as well. AAAnd I still have a bunch of it sealed up in a garbage bag in my basement.
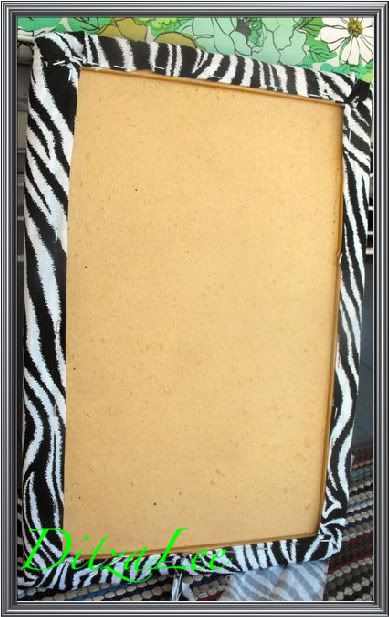
![]() I wanted to do the best I could to make the back of the board look as presentable as the front. The last one I had completed looked a hot mess! I folded the edges of the fabric under before attempting to staple it to the wood on the board.
I wanted to do the best I could to make the back of the board look as presentable as the front. The last one I had completed looked a hot mess! I folded the edges of the fabric under before attempting to staple it to the wood on the board.
 Nevermind the dirty floor boards, I finished the project on my porch floor, very shabby chic out there ;)
 I had a tough time with a batch of staples when I had to reload. They were stubborn and wouldn't push into the wood no matter how much body weight I put on the dang thing. So I spent a whole lot of time snipping them in half with the wire cutter and pulling them out, until I gave up and switched the staples all together. Which is probably what I should've done in the first place. Oh hindsight...
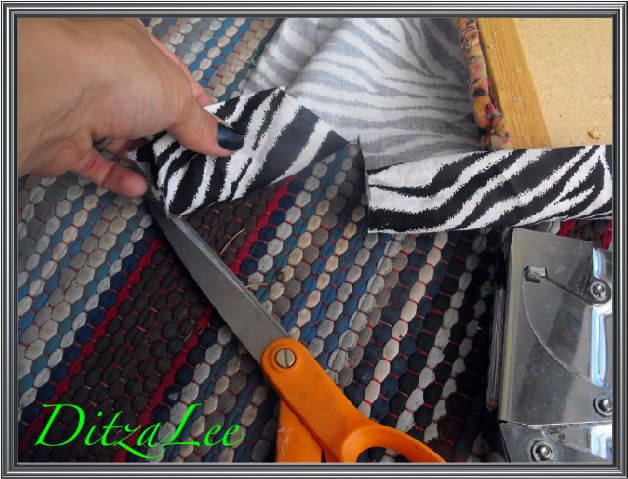 I cut some excess fabric off of the sides to make it easier to fold and staple. The foam was puffy on the opposite sides and the end result would have been bunched up and messy otherwise.
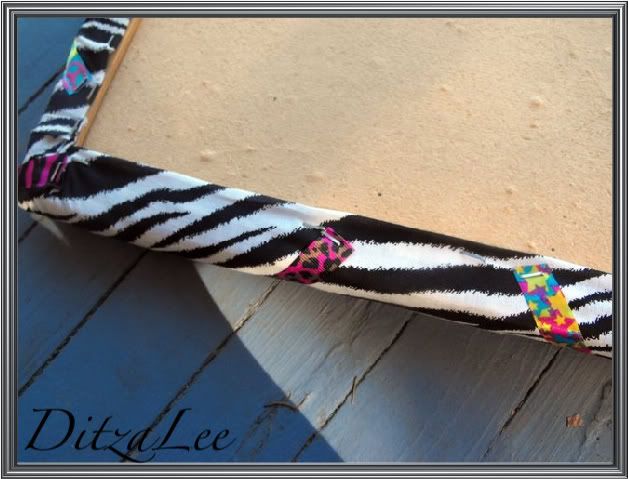
 Those corners were a bit tricky to make neat. The staples aren't all flush with eachother but, all in all this was pretty easy to do. Now for the ribbon...
 I drew up a quick sketch for how I wanted the ribbons to cross in the front to use as a guide. Then I placed the ribbon, stapled it, and pulled it taut to staple on the other side.
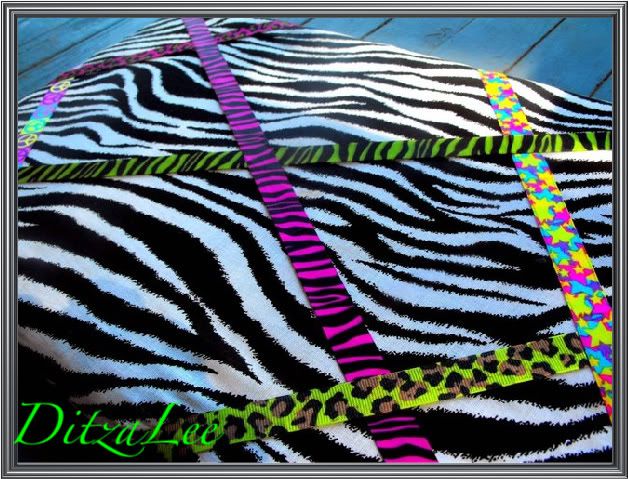 I love it! My little Tween loves it even more! There's a whole lot to do in her room still, being that she wants it painted blue. No more of the hot pink and green, which was the previous decor. She wants a lot of neon colors as well. Soooo, we're one step closer to complete!
Hope you like it! We sure do! Stay tuned for much more in the next few days. This week's packed!!
I love it! My little Tween loves it even more! There's a whole lot to do in her room still, being that she wants it painted blue. No more of the hot pink and green, which was the previous decor. She wants a lot of neon colors as well. Soooo, we're one step closer to complete!
Hope you like it! We sure do! Stay tuned for much more in the next few days. This week's packed!!
Jamie Lee


Love your blog, I have a feeling Im going to learn a lot from you! Can't wait
ReplyDeletefor future posts!
oh my goodness this is really cute and looks super easy! i'm all for those kinds of projects :)
ReplyDeleteThis is amazing, i'm loveing the fabric and ribbons !! I really should go back to being more crafty, I kind of miss it.
ReplyDeleteThanks a lot for your comments i was so smiling while reading it =) I'm defo gona stay tuned on your blog !!
hope you're having a good WE !! xxx Vee